Development module in Lightroom is what you need to know to be able to edit your photos and here you will edit and correct your photos is probably one of the places where you will spend the most time within Lightroom.
The options in this module are numerous and here you are only limited by your imagination. It’s a very long section so open the Lightroom development module and follow the post!
Development module in Lightroom
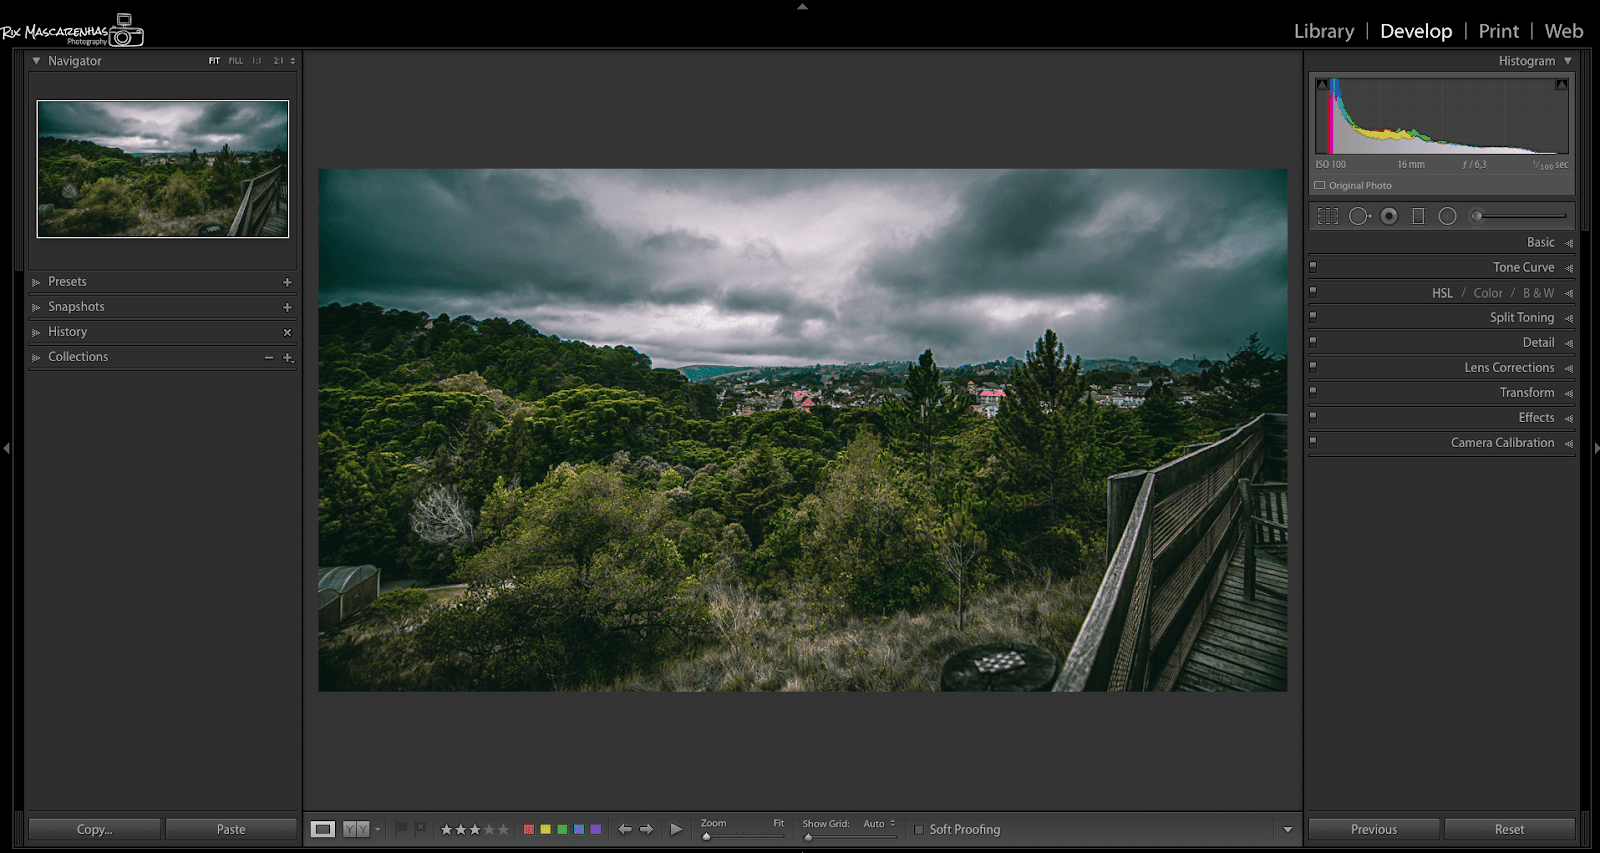
You will probably have a screen very similar to this one to work on your photos with very useful tools for your day to day. On the right side we will have all the photo editing tools and also the histogram, which is a very useful way to analyze our captures and always have well-balanced tones.
Histogram
The histogram will give you a lot of very valuable information about your photo. It is a graph of the different shades of your image.
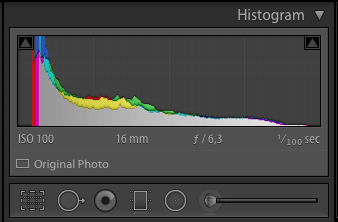
The darkest tones are plotted on the left and the brightest tones are plotted on the right of the graph, the medium tones are clustered in the center of the chart. In addition to the luminance values, how light or dark a region is, we also have the luminance values by colors.
And with the histogram it is possible to judge whether your exposure is correct and or which areas need to be better adjusted. All of this just by looking at this simple chart. The regions that appear to be higher contain more information of tones in that region, so if a region is touching the extreme sides of the graph, we possibly have a problem, overexposure or underexposure depending on which side of the graph we are looking, and need to be adjusted so that the photo has more controlled tones. To know everything about the histogram take a look at this article here .
In addition to being super useful for judging exposure, the histogram can also help adjust things like skin tones and the amount and color saturation.
You can also make adjustments to your photos by clicking and dragging directly on the histogram graph, this helps a lot but is always nice to look at and review your photos directly, never rely solely on the histogram information.
Lightroom Local Adjustment tools
These are the tools that will allow you to make adjustments to the small / local areas of your photo.

You will find (from right to left) the Brush tool, the Radial Filter, the Gradient Filter, the Red Eye tool, the Spot Removal tool and the Crop Tool. Clicking on each one will open a new panel that will give you options to use these tools.
Some of these tools are very useful in the daily life of a professional photographer, so get used to using them as certain results can only be achieved when using some of these tools.
Local adjustments should be made after you have done basic editing on your photos, that extra step we need to make the photos the way we imagined. To find out all about local adjustments in Lightroom take a look at this other article here where I put all the tools into practice.
Basic panel
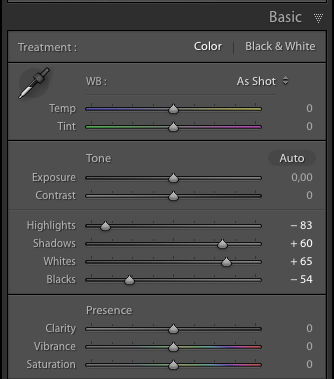
The basic panel will be your most used panel when making adjustments to your photo. This is where you will adjust your white balance, exposure, contrast, shadows and highlights, clarity, saturation and vibrance of your photos.
Moving the sliders to the right will increase the adjustment value and moving the sliders to the left will decrease the value.
Things like exposure and saturation should be self-explanatory. Other adjustments such as brightness, highlights and shadows may be more subjective for some people.
- Exposure (Controls how light or dark the photo is in its entirety)
- Contrast (Controls the difference between the lightest and darkest regions of the photo)
- Highlights (Controls only the brightest regions of the photo, regions that are not yet white)
- Shadows (Controls only the darkest regions of the photo, regions that are not yet black)
- White (Controls only the white areas photo regions)
- Black (Controls only the black regions of the photo)
- Clarity (Controls contrast only in the middle regions of the photo)
- Saturation (Controls how saturated the colors in the photo will be)
- Vibration ( Controls how saturated the photo colors will be for warm colors only)
The eye dropper at the top left of the panel gives you the option to adjust your white balance by clicking on the dropper and choosing different areas of your photo. It works best if you choose a neutral area of your photo to use as a reference . Usually, I look for gray or white tones.
White balance is something that can totally change the look and mood of a photo, so try to use something that makes sense for the type of photo and light you are using. Take a look at this article here and you will see how white balance is important for your photos.
Tone Curves
The tone curve is another way to adjust your photos, here we can adjust not only contrast but also highlight, shadows and mid tones. The tone curve is one of the most powerful tools in a photographer’s arsenal. We can adjust not only the luminance of the photos but also their colors. There are actually 4 tone curves, one for luminance (Light and dark areas), one for reds, one for green and one for the blues in the photo.
Take a look at the video below and you will see how powerful the tone curve is.

This editing section can be the turning point for some photos, don’t forget to work with the settings here in a moderate way.
HSL / Color / B&W
HSL stands for H (Hue), S (Saturation) and L (Luminance). Essentially, you can make adjustments to the colors of your photo using this panel. Working in the same way as on the basic panel, left decreases the adjustment and right increases the adjustment. In the case of the H (Hue) tab, you are effectively transforming the color of your photo into another one. EX:
Reds > adjusted to the left becomes more pink
Red > adjusted to the right becomes more orange

It will work for all colors inside the Hue tab (each color depending on its neighbor colors, left or right)
Clicking on the Color tab, we have the same adjustments, but they are divided by colors, each color with its saturation, luminance and hue adjustments. Sometimes it is simpler to view just the adjustments for one color instead the adjustments to every colour.
The B&W tab is used when converting a photo to black and white, on the Development module in Lightroom just press the V key to convert your photo to black and white and you will have access to the B&W tab.
Split Toning
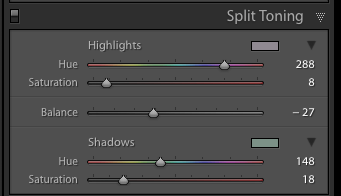
This is where you can add a color to your highlights (or light areas of the photo) and another color for the shadows in the photo. Here we can start creating more artistic effects on the photo. To get a better idea of how Split toning can be used.
Details
This is the panel you will use to enhance sharpness to your photo and is where you can reduce the noise / grain introduced in your photos. Grain can be introduced for a variety of reasons, the most common of which are photos in low lighting situations, very high ISO settings or the quality of your digital camera’s processor.
Amount (sharpening), always has to be used carefully, and controls how much you are artificially adjusting the picture sharpness.
Radius, controls the size of the sharpening area. The default value of 1.0 means that Lightroom sharpens over 1 pixel around the edges of the photo, the edges of objects, mountains as an example.
Detail – as the name suggests, controls the amount of sharpness at the edges or “details” of the image. A value like 0 only sharpens the large edges, while a high value like 100 would sharpen even the smallest edges.
Masking – the most useful and versatile feature that masks areas that should not be adjusted, similar to Photoshop’s mask tool .

Lens corrections
This panel is used to correct any distortion and chromatic aberration caused by the camera lens. Just click on the boxes to remove aberrations and enable profile corrections normally Lightroom takes care of the rest. If Lightroom does not recognize the lens you are using, you can choose the lens from the lists looking for brand and model.

We can also adjust certain distortions manually using the Distortion and Vignette controls. Get acquainted with these controls and you will see how they can be useful for your photos.
Transform
Most current versions of Lightroom have a new panel responsible for controlling the perspective of your photos, helping to eliminate unwanted distortions. It is a panel where we can control perspective of the photos, rotate, move left or right, above or below and much more.
The most useful adjustments are Leveling where Lightroom tries to take care of leveling the photo with the horizon. Guided, where you will draw your lines on your photos that must be parallel and Lightroom takes care of adjusting the perspective.
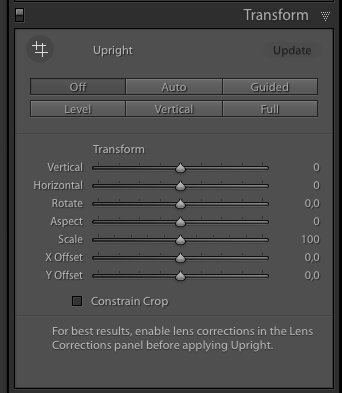
Try to use all the controls and find out what each one does, you will see that they are much more useful than you imagined.
Effects
In Effects, we can change the amount of vignette you want to use in your photos, and also the amount of grain that can be added.
Post-cropping vignette is the official name of the first effect, and as the name says, the vignette will be applied after cropping the image, so even if you change the cropping of your image using the Lightroom cropping tool, adjustments made in your vignette accompanied the new crop size.
The controls are:
- Amount (how much vignette you want)
- Midpoint (area of operation of the vignette)
- Roundness (vignette format)
- Feather (edges of the vignette, more or less defined)
- Highlights (protects highlights areas receiving a heavy vignette)

Not all photos need vignetting, so use this feature carefully and you will be on your way.
In the Grain effect we have:
- Amount (controls how much grain is added)
- Size (grain size)
- Roughness (how rough the grain will look)
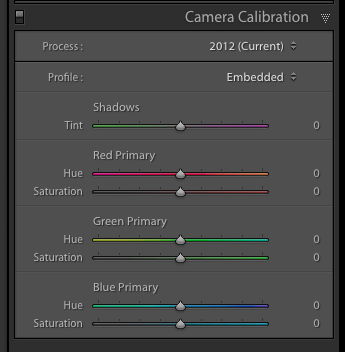
Camera calibration
This is where you can change your camera’s color profile and the Lightroom process version of the photo. It is not a simple region to work in, but it is very useful for those looking for new ways to color their photos.
The adjustments are very similar to the settings on the color tab, where we can change the hue and also the saturation of the primary colors captured by the camera sensor.
Presets and Organization in Lightroom
On the left side we have another tab and a lot of menus, don’t be afraid, it’s super simple.
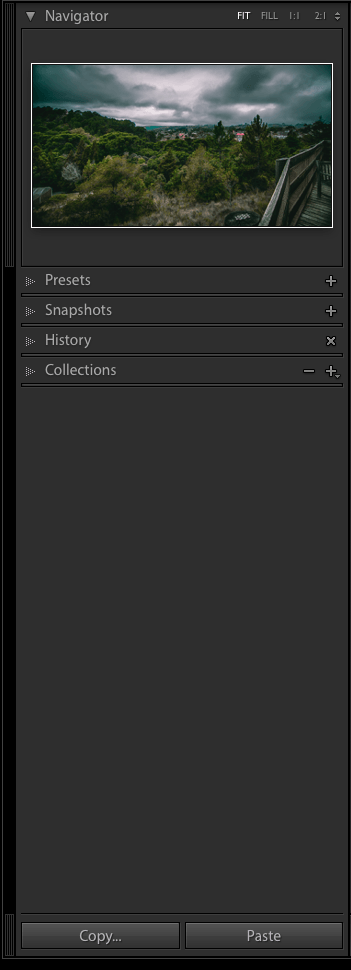
Navigator
We covered this in the last lesson, but as a review, this is where you will see a preview of your image. As you use the zoom tools above this small display of your photo, a rectangle will appear and you can drag it around to decide what you see in the main image area of the development module. The browser is also where you can see a preview of any preset you want to apply. Just hover your mouse over the preset name and a preview will appear in the Navigator.
Presets
This is where Lightroom will store all of the presets you install, as well as any that you make.
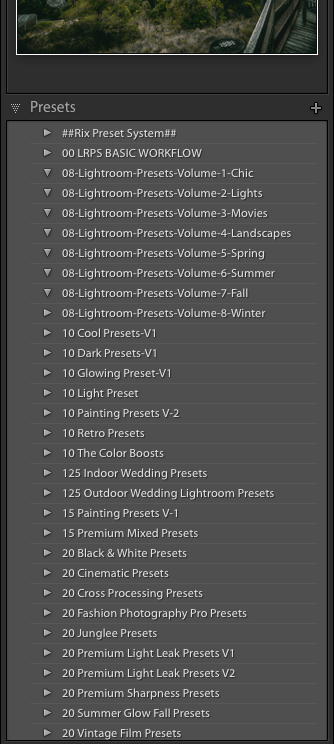
To see the individual presets, you need to open each collection using the triangle on the left side. To apply a preset just click on it.
Snapshots
Lightroom allows you to take snapshots of your photo at any point during editing. Click the “+” in the Snapshot panel to add a Snapshot. This is a cool feature. For example, let’s say that you edit a photo using a preset and want to apply another preset and to compare which one looks better. Just take a Snapshot of the photo with each one of the presets and then compare the results.
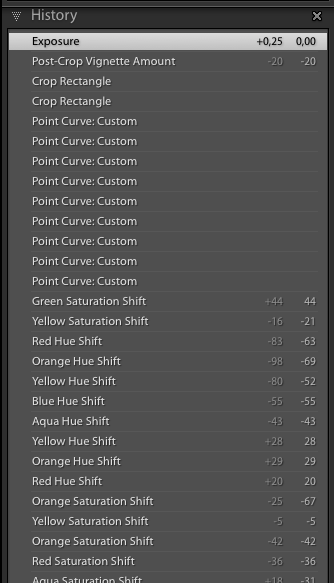
History
This is one of the reasons that many people still use Lightroom, the photo History system is super powerful and useful. Helping you to return to any point in image history since it was first edited within Lightroom. So you can revert any edits you made that didn’t work so well.
Collections
We talked about them in the last post. However, you will notice that the collections panel is available in the Development module in Lightroom, as well as the Library Module. The collections panel is available in all modules and will be the same in all modules. However, you will notice that you do not have access to your Folders in this Module. This should help you understand why creating collections is so valuable and time-saving.
Bottom toolbar

The Lightroom Development Module toolbar is located in the same place as the Library Module, but will have different tools in each module. Here you will find many useful things, as a comparison tool, before and after, indicated by the letter Y, classification flags, which are two, one for the photos that will remain (shortcut P) and another for the rejected photos (shortcut X) and are useful for choosing which photos will remain in the catalog and which will be discarded, star rating system, where you can give a star rating for your photos, color classification labels, where you can define a label color for your photos, and define what each color means.
Navigation arrows between photos, left or right. Slideshow, zoom, grid size are practically self-explanatory, as well is the proof button for photos on a light background.
Phew… .And for the fourth day we stopped here, but of course tomorrow there is more!
Mastering Lightroom in 7 days
Mastering Lightroom in 7 days – Day 01 – Catalog
Mastering Lightroom in 7 days – Day 02 – Import
Mastering Lightroom in 7 days – Day 03 – Library module
Mastering Lightroom in 7 days – Day 04 – Development module
Mastering Lightroom in 7 days – Day 05 – Editing your photos
Mastering Lightroom in 7 days – Day 06 – Presets and Colors
Mastering Lightroom in 7 days – Day 07 Export or Print
Leave any questions about Lightroom in the comments section! And don’t forget to share this series of posts and help more people and Master Lightroom.
![Dominando o Lightroom em 7 dias [ Dia 03 – Módulo de biblioteca do Lightroom ]](https://fotographiko.zz.mu/wp-content/uploads/https://drive.google.com/uc?id=1RIa-xP34TroEpEMavdU_oiBtzOpWrq7w)
