Today we have modern cameras, artificial intelligence, miraculous applications and lots of technology for all sides, are there still reasons to learn how to shoot in MANUAL MODE?
Of course, nowadays with the huge technological advances we can not always afford to learn how things were done in the old days. Like learning to shoot using only manual camera mode, for a lot of people this is a tremendous waste of time, and maybe it doesn’t make any sense at all to do it.
But of course for many curious, like you and me, this is a totally valid subject because automatic settings of the cameras will not always to save you. And I can go even further and put autofocus on the same package, the autofocus of the camera will not be always your friend.
In today’s article, I will give you at least 4 reasons to learn how to shoot in manual mode. No matter what camera brand you use, as long as it has a fully manual setup this article will help you.
How to shoot in MANUAL MODE?
There are many reasons to shoot using your camera’s manual mode, the reasons range from simple things to more complicated things. And having this knowledge up your sleeve will help you better understand both your camera and your photography.
Depth of field
The quickest way to make your photos look professional is to control depth of field. The depth of field can be well seen and explained when we talk about photos with blurry background.

As in the photograph above where it is possible to see the sunflower in focus but everything behind it is out of focus or blurred. This is part of what we call depth of field, and can be easily controlled and manipulated using your camera in manual mode.
When we take a picture, we use a certain setting to achieve a small depth of field. The same will not happen when we photograph a landscape, where we will need a completely different fit.
The manual adjustment that you will modify is the aperture to help you resolve how much of the object will be in focus or not. We can manipulate the aperture of the lenses both by the camera settings and by adjustments to the lens itself, depending on the make and model.
It is common to use wide openings to make portraits, so we decrease the depth of field. Adjustments between F/1.4 to F/2.8 usually do the job well. For scenes where we want pretty much everything in focus, as a landscape we will use narrower adjustments, F/8 up to F/22.

This is definitely a great reason to use manual camera mode. Of course, you can just use Aperture Priority Mode and get pretty much the same results.
Creativity
When you don’t make all the decisions, you are no longer responsible for the results. This is pretty simple to understand. When we shoot in automatic mode we lose the chance to be creative, because we leave it up to the camera to make all decisions about ISO, aperture, shutter speed and even white balance. This takes you completely out of creative control of your photo.
Some cameras still make a big mistake in their automatic shooting modes and forget to take into account what the minimum shutter speed will be for the lens being used. So even in auto mode it is possible to take shaky pictures.
To be able to take full advantage of the camera you bought, it is very important to know how to control every aspect of your exposure triangle. It is essential to know what the ISO does, what the aperture does and also what can be done with shutter speed.
So we take back creative control of things

If you get lost I advise you to read this other articles here, I guarantee you won’t want to use the automatic mode of your camera anymore.
- Use shutter speed to create movement
- What is a Stop? And what’s the point?
- Take control of your camera to enhance your photos.
Take photos without flash
One of the things that annoys me the most is when you select a certain setting on the camera and suddenly the flash devil pops-up. Besides giving you a freaking scare, most of the time he’s completely unnecessary.
Shooting using the camera’s automatic modes is letting the camera itself decide when it is or is not to use flash. This is very annoying because usually the flash built into the camera is a real s***. (whoever reads this will think I hate flash)
I say this because I don’t like to get stuck with the lighting position, and when we have to use the built-in flash in the camera, that’s exactly what happens. The flashlight goes straight to the face of the subject being photographed. You can’t put it more to the side, you can’t let it any further away, and you can’t manipulate her intensity with a reflector or something.
So using the automatic mode only helps you not to have control of anything else.
When we use manual mode, or semi manual modes, we have more control over things, including whether the flash will turn on or not. And if it turns on, what’s the time he’s going to be on, or the flash’s power. This all puts in our hands everything we need to make the decisions and take a good picture.
This was one of the great reasons that made me want to learn how to shoot in manual mode.
White Balance Correction
One of the great things about digital cameras is that they allow us to change the white balance of the camera, according to the type of light we are photographing (e.g., sunlight, tungsten lights, flash).
And this makes a huge difference in the photo we’re taking, because it can manipulate the colours or make them totally true to the scene we’re seeing.
I remember to this day how I learned to use the white balance. I showed some pictures to a friend who is a photographer asking for some suggestion. The only thing he told me was:
Beware of white balance
I pretended I understood what he just told me, so I went running home to do my research. In conclusion, my photos were coming out all bluer than they should because I was using the wrong white balance.
When we use the camera on automatic, it will probably adjust the white balance to AWB (automatic white balance). This can be a great danger, especially if you are shooting in JPEG. Because you run the risk of the camera misinterpreting the light of the scene and choosing a white balance that doesn’t match what you want.
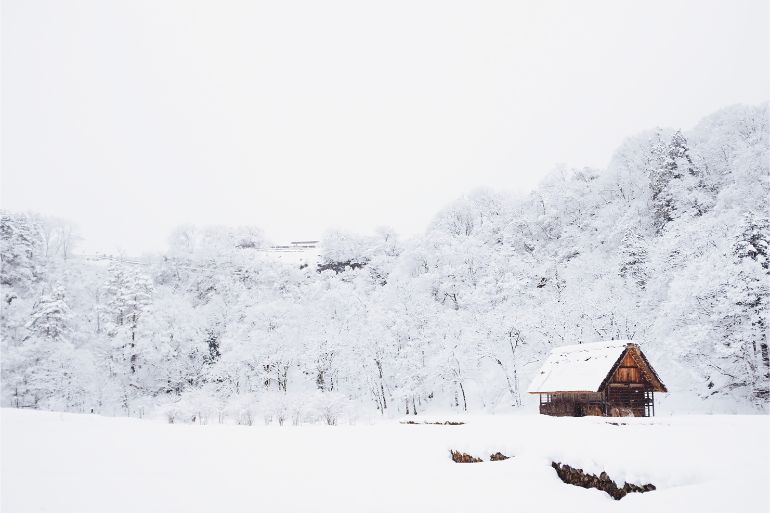
There are big problems when we photograph brides or a lot of snow, usually scenes that contain a lot of white colour, because minimal changes in light can make the white balance go rogue, and your colours are gone
If you choose the manual ISO mode means that you will also choose which white balance will use. Soon if you make the right decisions you won’t have any problems.
Extra tip
Choose whenever possible to shoot in RAW, so you can choose the white balance at the time of photo editing.
Extra tip 2
At the beginning of the section or in the lighting change, use a Grey Card to record a white balance reference.
For those who prefer to shoot on automatic, no problem, just keep in mind that all you “are doing” is not you who is doing it is the computer in your hand. Maybe the only merit you have is the composition. But of course this does not get to be a big problem, after all even using the camera in the automatic mode the photos almost always came out good.
You can start slowly and use some priority mode first and then evolve to full manual mode.
There it goes, if you wanted some reasons to learn to shoot in manual mode, here were at least 4 of them. If you liked the article share on your social networks and use the hashtag #dicadofotographiko.

