Hey everyone, for this week’s article we are going to talk about the newly update Skylum Luminar 4.3. But is not just it. I’m also going to show the most recent updates since the version 3 and how this updates can change the way we going to edit our images from now on.
Skylum Luminar 4.3 – The change is coming
Since the first version of Skylum Luminar the software change dramatically, in a good way, new tools were added, old tools was retired but most importantly they app evolved, not just in visuals and user interface but also in usability and new ideas.
If you follow the log you probably have already heard of Luminar, I have made videos and posts about it, and for the most part Luminar works worked well in the past iderations, but at least for me that was always something that would be a little better.
Things like speed, support to some RAW files, support to camera profiles and the big one a image library were added through the way until we get at version 4.3. I have to say Luminar is still not perfect, but is getting there real quick, and the best part is the company never stop hearing us, user, and implement some of our suggestions, so the future of this software is bright if they keep dropping good updates like this one.
Skylum Luminar Latest update
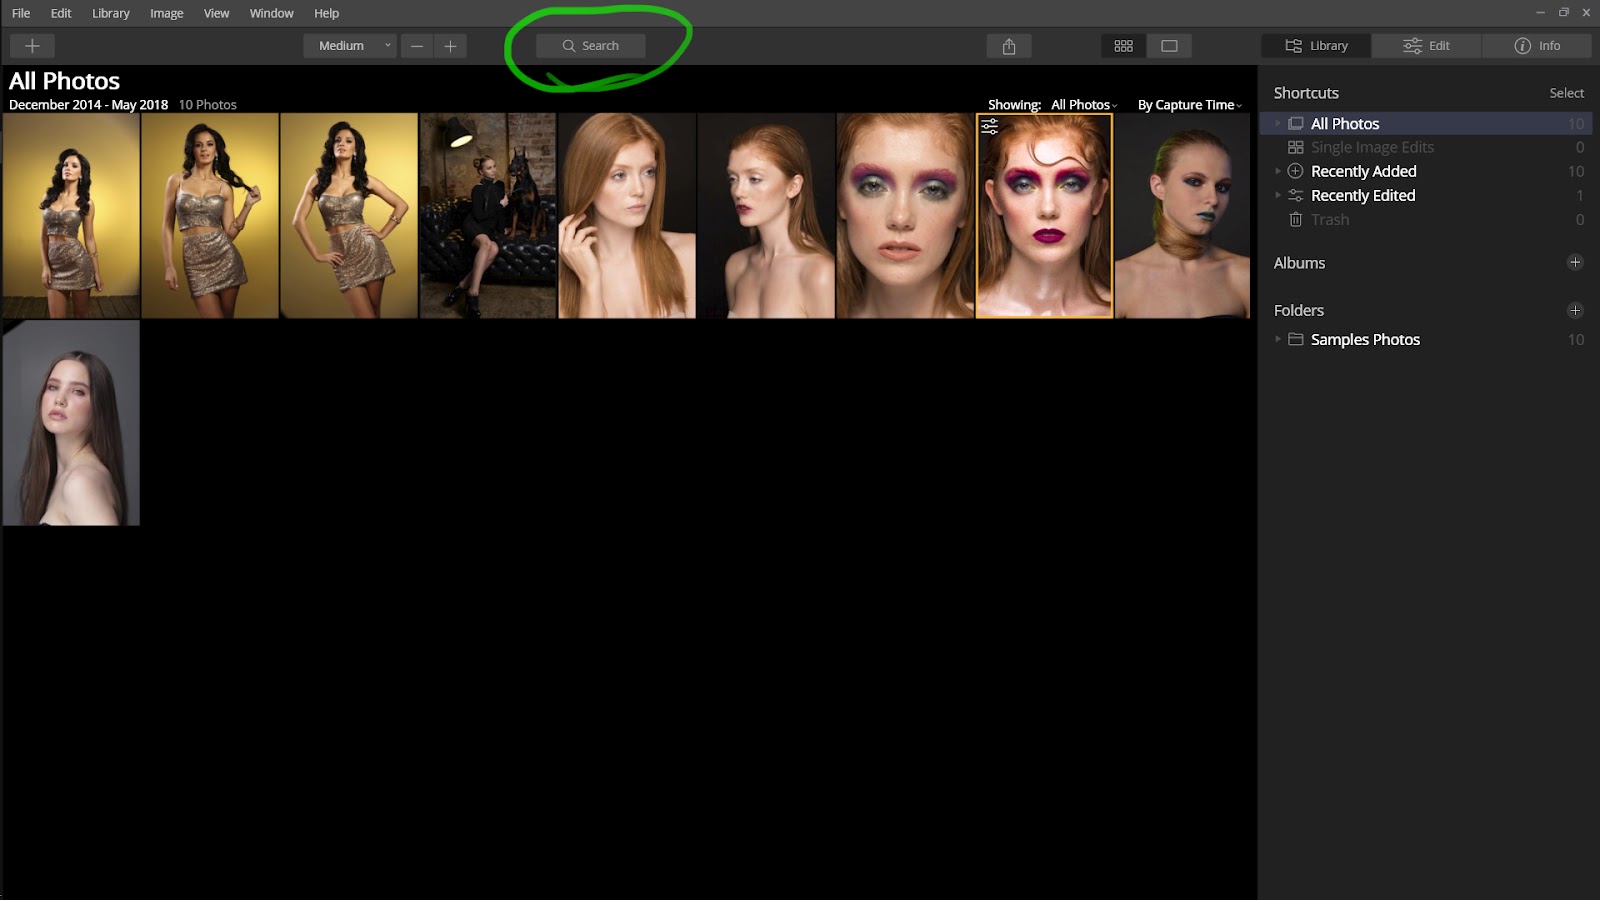
Luminar 4.3 is packed with new things under the hood, and some new great additions, like a waited way to sear for you photos, which now can be done with the new search tool on the top of the program.
Under the hood is where the real magic happened, we have a great evolution on the performance side of things, which was one of my big complains since version 3, which improvements in areas like filters workflow, looks implementations and previews, support to new cameras and so on, if you want to see complete list of the improvements check the Skylum Luminar blog post.
Using Skylum Luminar for the first time
If you decide to go to this new new root and chose Lunimar as your new DAM and editing software there are some thing you need to know before you start. Coming from the Lightroom school you will probably feel a little lost because of the simplicity of Luminar 4.
You can choose if you going to create a Catalog or if you want to edit just one photo, which is nice for those who uses other softwares to manage their libraries, like Photo Mechanic. but if you want you can create an image library inside Luminar 4 and use it as you DAM, keep in mind that if are accustomed with Lightroom tools to make your mananing you will find that right now Luminar doesn’t have all the tools that we have inside Lightroom.
Let’s say you will start to use the Luminar Library the first thing the software will ask you when you open it is to create a new catalog, just chose a name and a location where your catalog will live and you are done. After that you are ready to start importing all you photos inside luminar and ready to edit them.
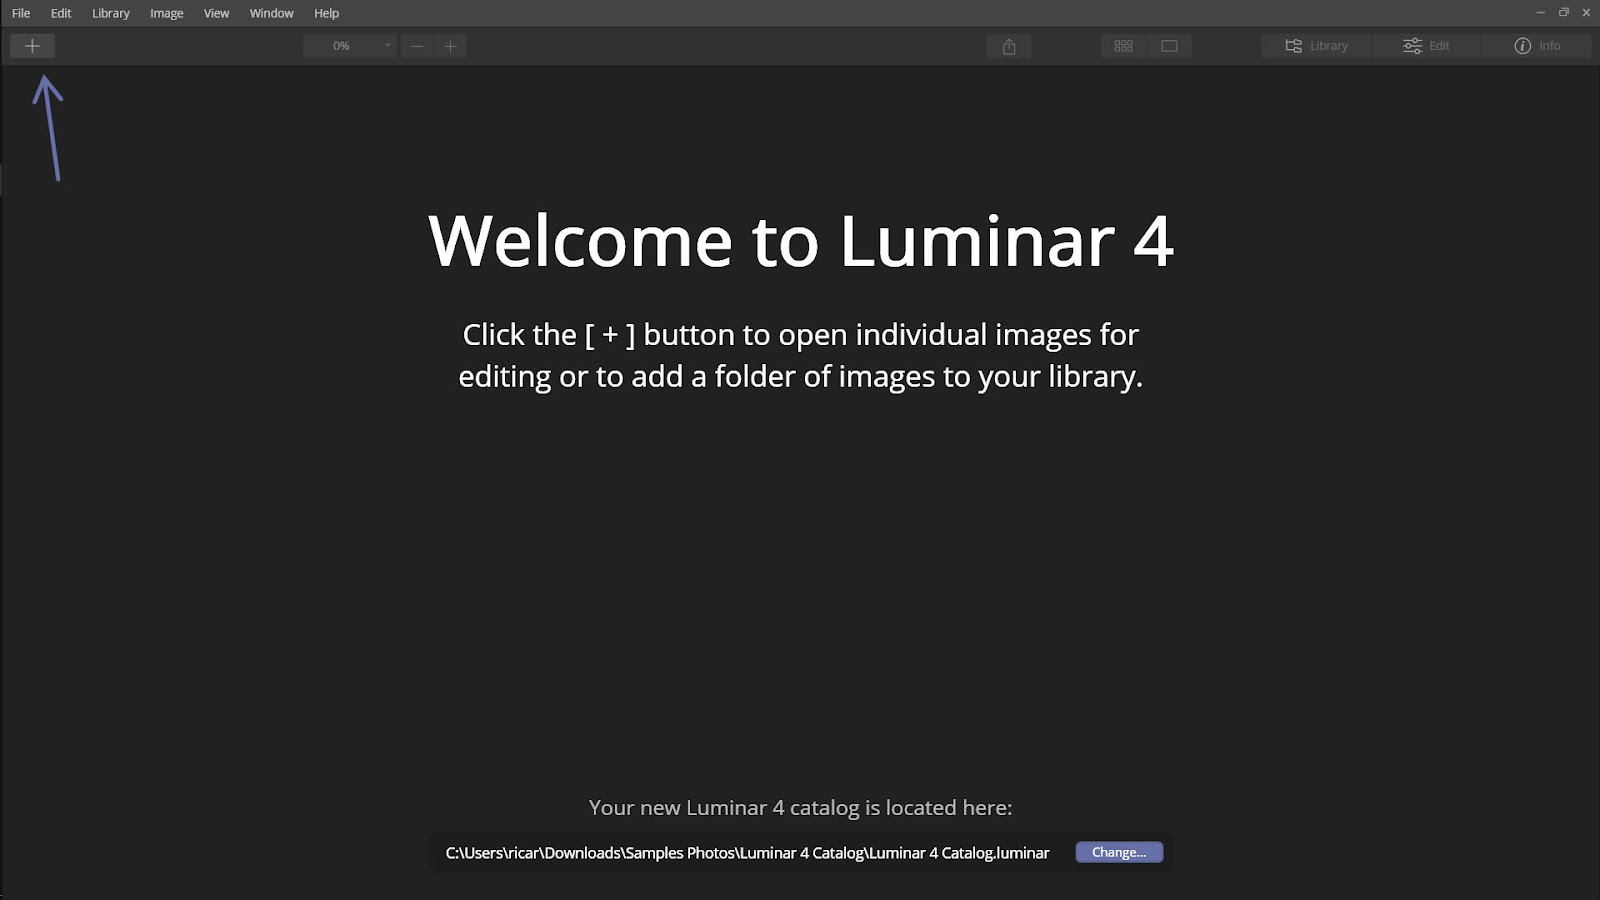
Just click im the plus sign and chose your photo folder, or folders, and wait until luminar import their location and create the image previews.
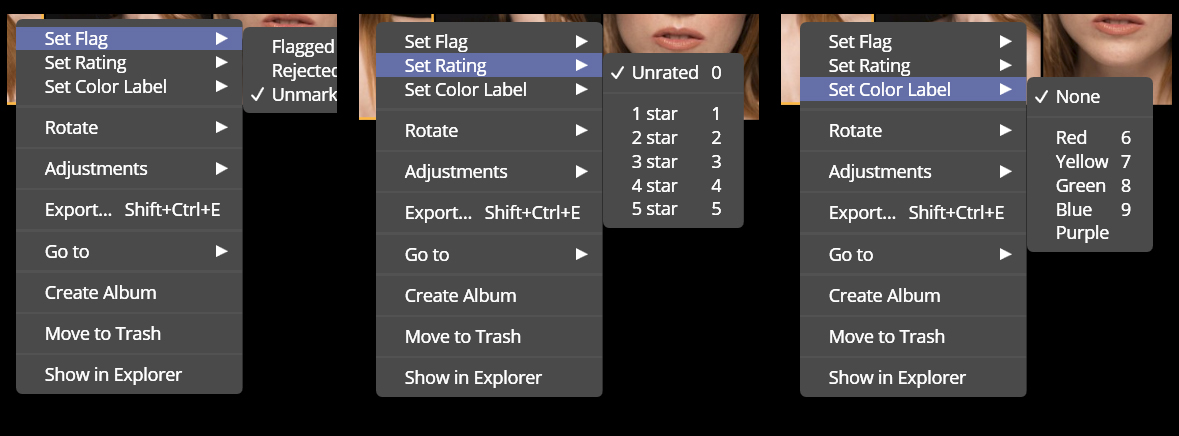
After all this process you can start culling your images, giving then stars, flags ou color labels, super easy. Right click in the image and choose your preferred option or just use the shortcut keys.
One sad thing that I always miss inside Skylum Luminar 4 are the ability to search photos by keywords or metadata, but maybe it will be an implantation in the future.
Other option like create collections, which inside Luminar 4 are called Albuns are pretty nice and easy to make, this way we can take the organization game to a good level.
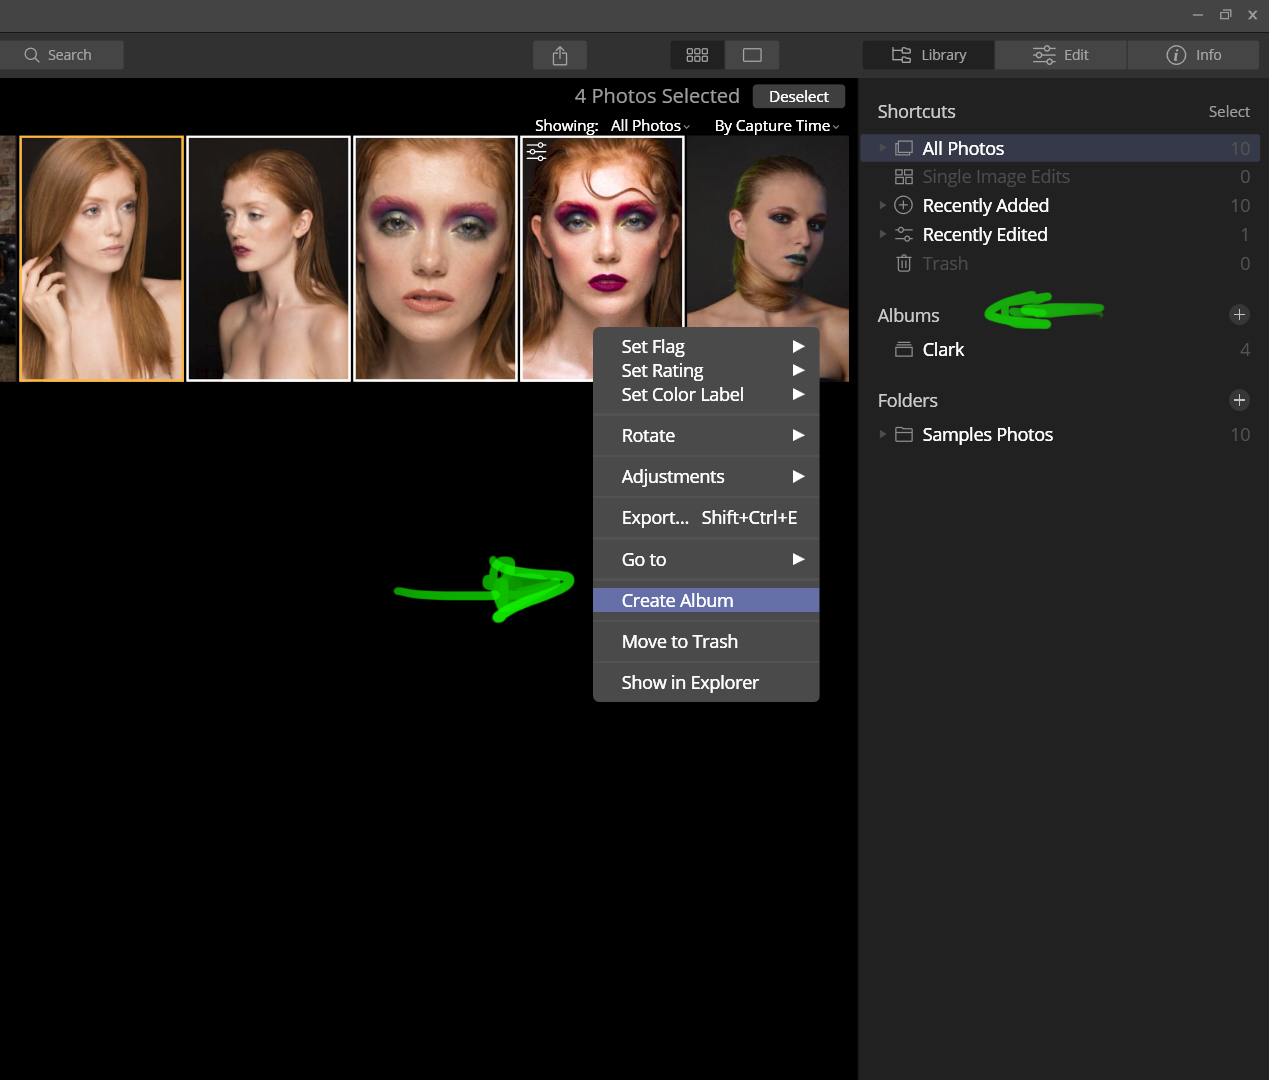
Just select all photos that you want to make part in the same albuns right click it and chose create a new a new Album give it a name and it will appear on the right side painel, easy peasy. After you create your Library system you can star to have fun with all the edits possibilities that Skylum Luminar 4.3 brings to your game.
Editing with Skylum Luminar 4.3
Just jump on to the Edit tab and star to have fun, if you are here for the first time you will find that Luminar is a lot different of Lightroom. And this is a good thing, because it will make you to think a differently to get your images done.
But once you start editing your photos your workflow will develop a lot like Lightroom, just the mane of the filter and tabs that will change compared with Lightroom.

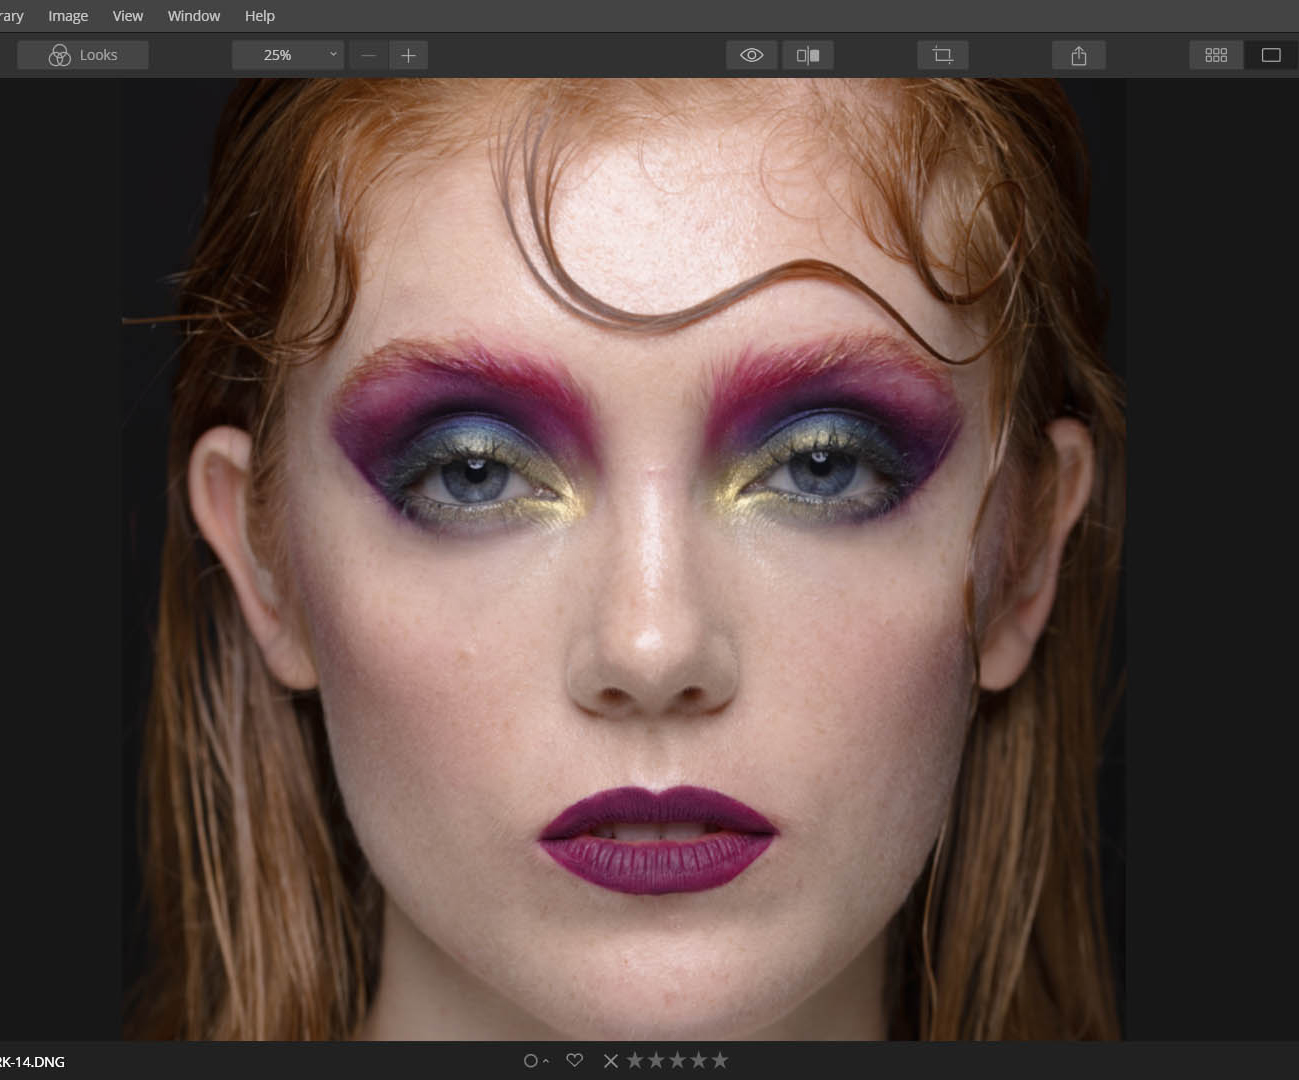
I am going to start with the most useful section to me, the portrait one, this part of the program is where I spend most of my time. Even if Luminar is recognized for most photographer as a great piece of software for those who love landscape photography, I think this app can do much more with fewer click compared with Lightroom or even Photoshop.
You can star on the Essential tabs to adjust things like exposure, white balance, shadows and highlight and so on. In this tab we also can change the camera profile to control the overall look of the image.
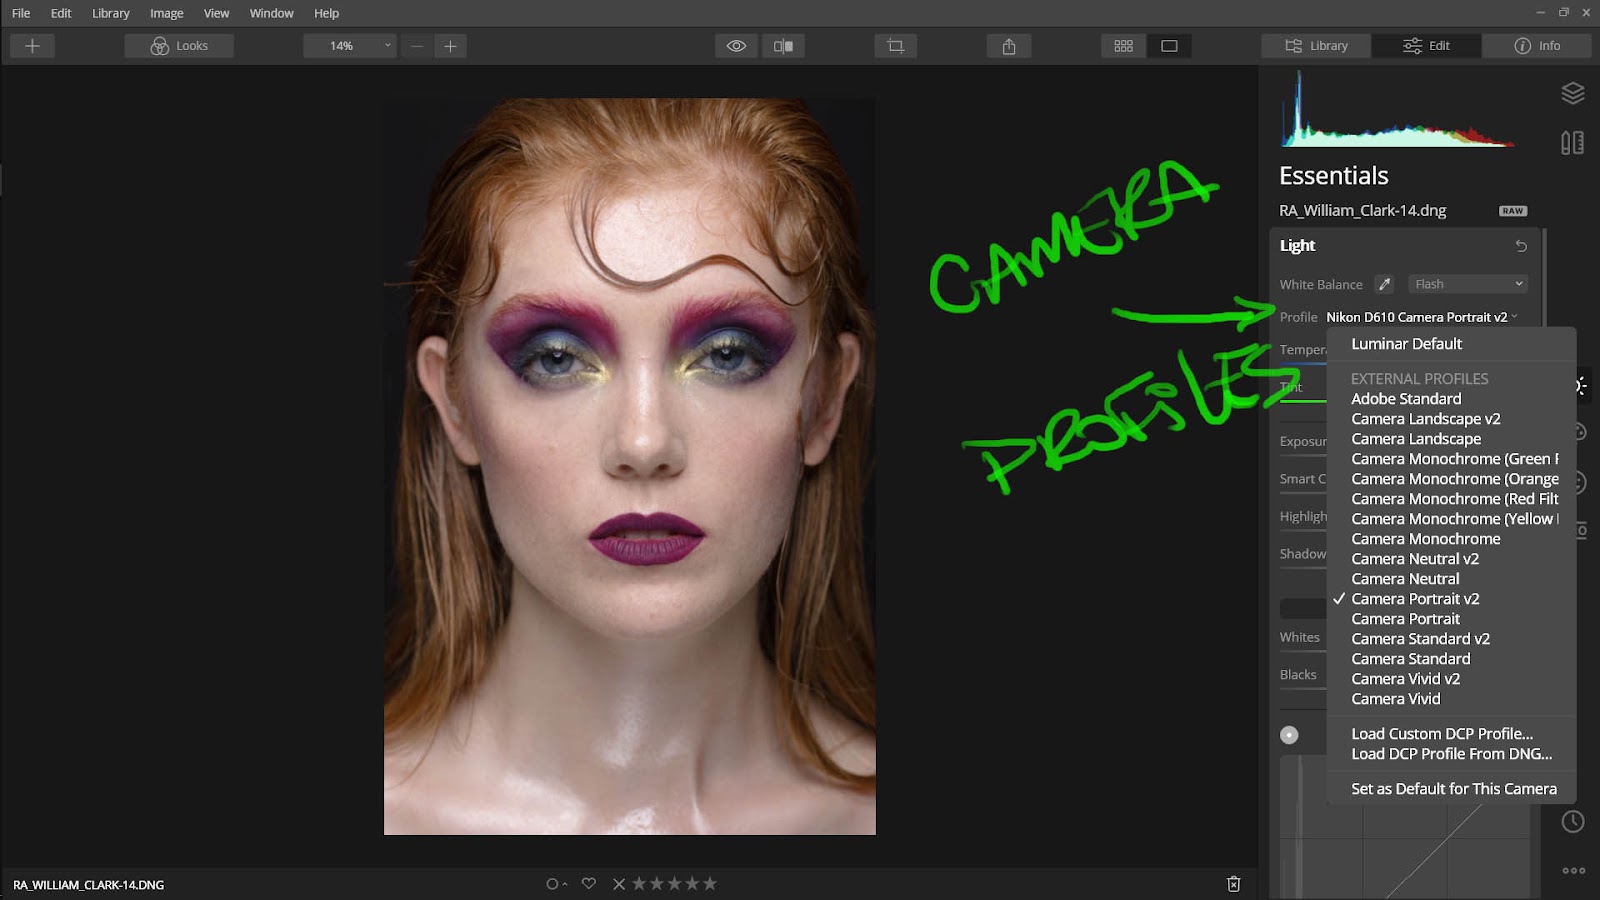
It is possible to choose a different camera profile that is not baked into your camera settings which is really useful for those trying to achieve different looks for their photos. On the Essential tab you can also use Curves, AI Enhancer, Colors, B&W Conversion, Denoise and Vignetting. Just using this tab you can completely edit you photos.
I use is to create a base edit for mine. Try to experience at first with all the slider, I feel that they have much more latitude compared with Lightroom, so it’s easy to go over the border.
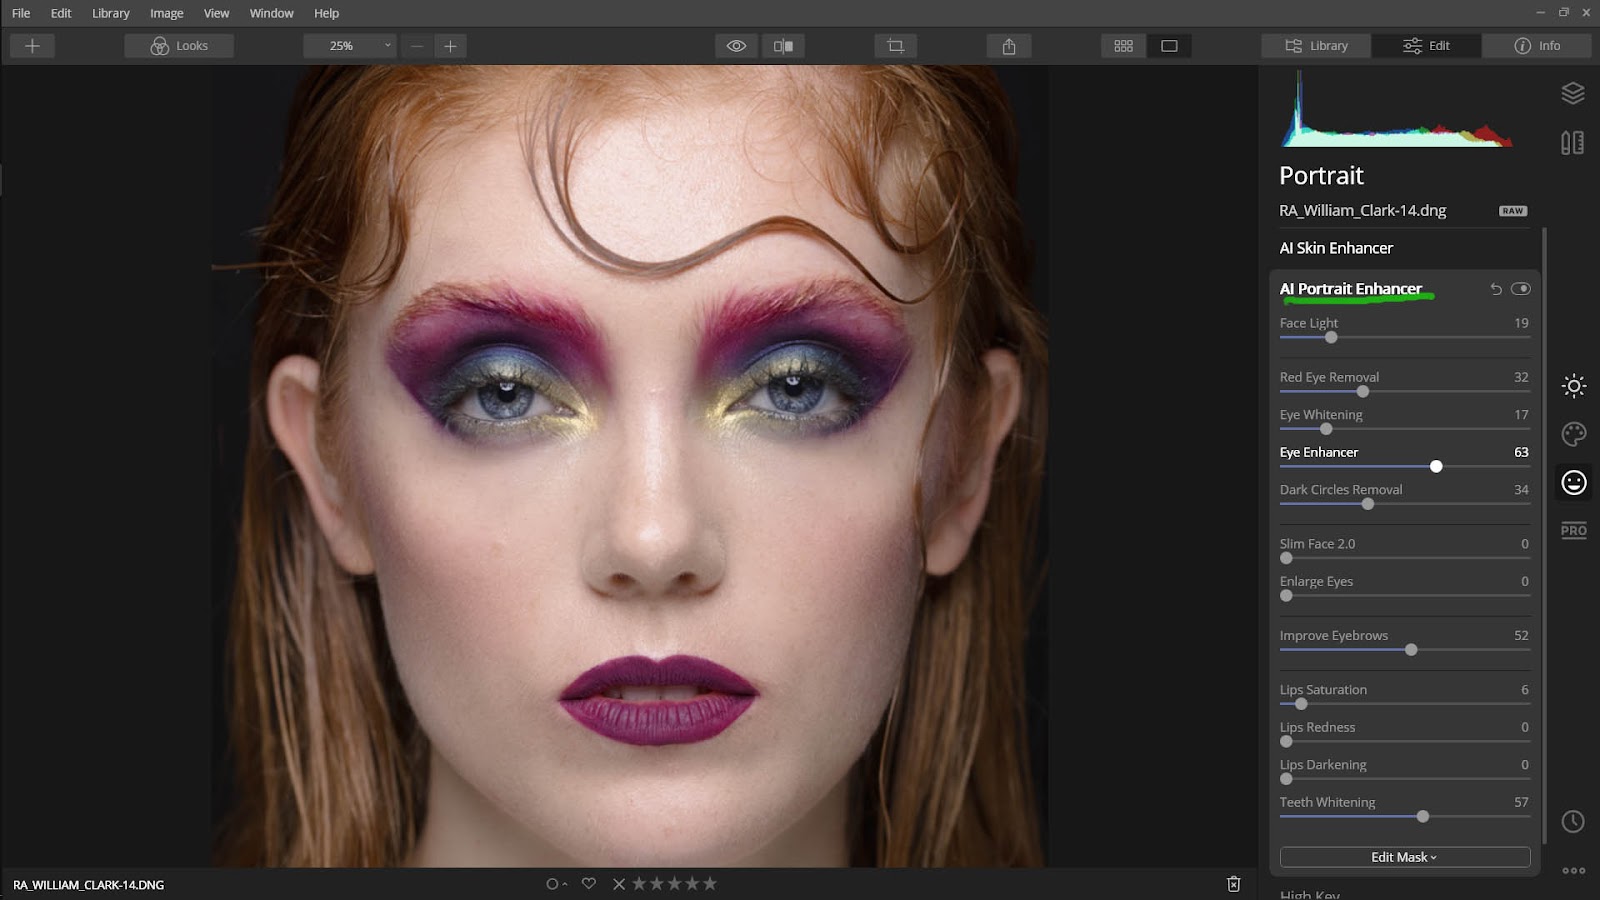
After that, if I am working on a portrait, I tend to go to the Portrait tab and do some retouching and other adjustments. The portrait module is the third, top to bottom, on the edit modules sections. I count with more than one filter, but the most impressive ones are the filter which uses IA to edit the photos.

Accessing the AI Portrait Enhancer you will be presented with a lot of good stuff that can be transforming your photos completely. You can adjust with just one slider o lot of complicated parts of your edits.
We have dedicated sliders to enhance the colour and contrast of eyes, dark circle removal, to improve eyebrows and all sort of things. Is all pretty easy and self-explanatory.

You can also use mask to limit this adjusts only to parts of the photo where they are needed, you can use a brush, a gradient filter or a luminosity mask to create your masks.
In the screenshot below we can see how just a few slider can change you photos in a super simple way and you will never thing to go back to other editing software. My preferred slider in this section is the Eye Enhancer, the contrast and the bump in highlight and color are magical, and you don’t need to create a mask for it the AI takes care of it for you.
For portraits we also have 2 more awesome tools AI skin Enhancer and a dedicated Dodge and Burn tool. The first one uses AI to identify areas of the skin that need to be treated and intelligently uses a automagically frequency separation to preserve the areas that need to be treated and boy it does a good job, this is the easiest way to make this kind of job easy and simple.

Just two slider and boom! Job mostly done. If you can achieve a new level of skin retouching you can also use the clone stamp tools present on the Canvas tab, second icon on the top right corner.
The Dodge and burn tools are super useful, and you can control the amount of affect you ant in your photo with just one slider, after you locally have painted the areas you want it to affect.

Normally here you are mostly done with all the retouching and basics edits for your photo, in some cases the image here is done just waiting to be exported. But you if want to thing to go a little further you can use the Creative tab, and put your creativity to the test.
In this tab we have tons of options to get a more stylized image. Some of then works very well in portraits other are intended to work in other types of photography.
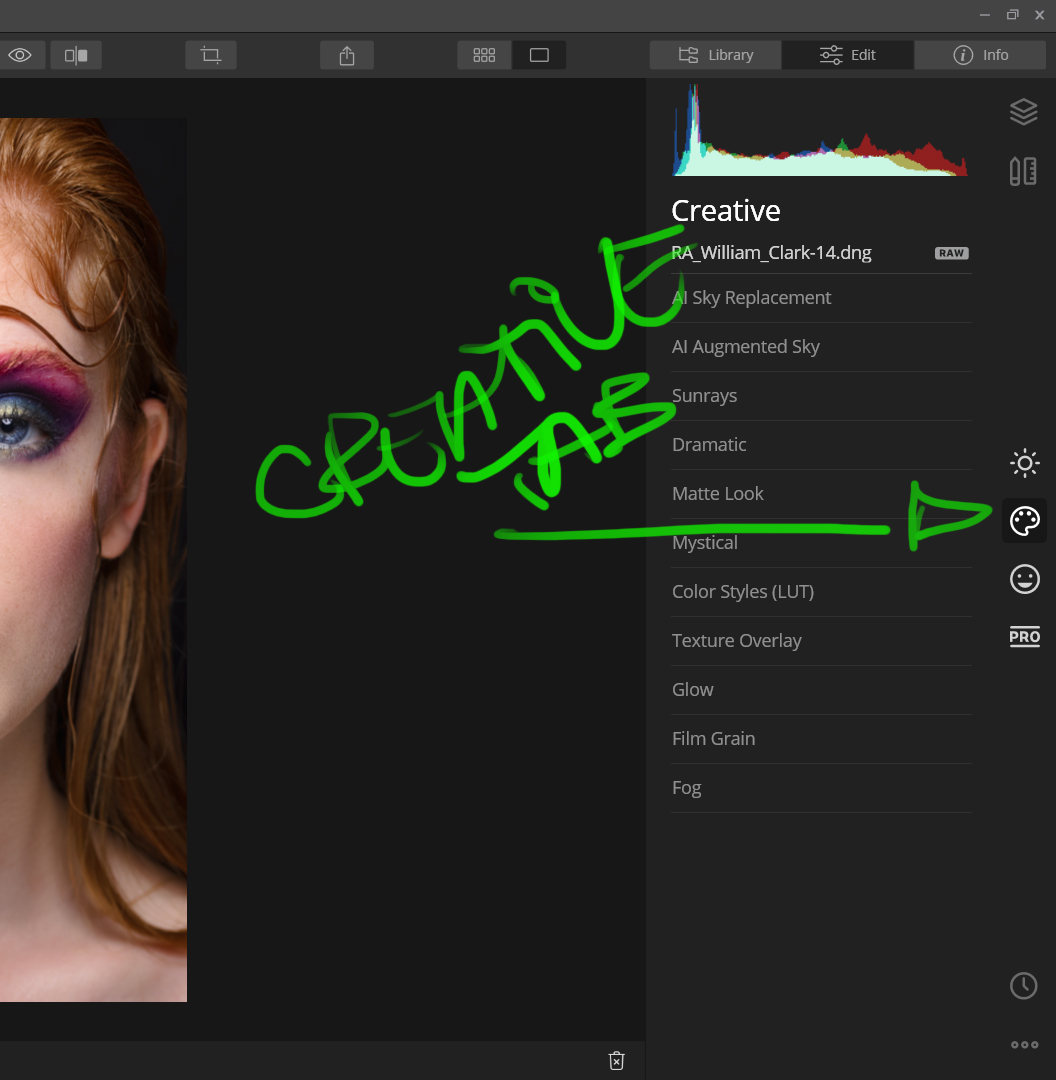
For portraits my preferred section of the Creative tab is the Color Styles where you can choose from LUTs (lookup tables) to make great changes to the colour of your images with just a reference file and 3 slider, easy.
Even if Skylum had put some LUTs available inside Luminar 4.3 you can also choose your preferred LUT and make the edit. This way you can change the vibe of the picture without have to change colour per colour in you image.
The other option on the Creative tab are very useful if you editing landscapes or other type of scenery photography.
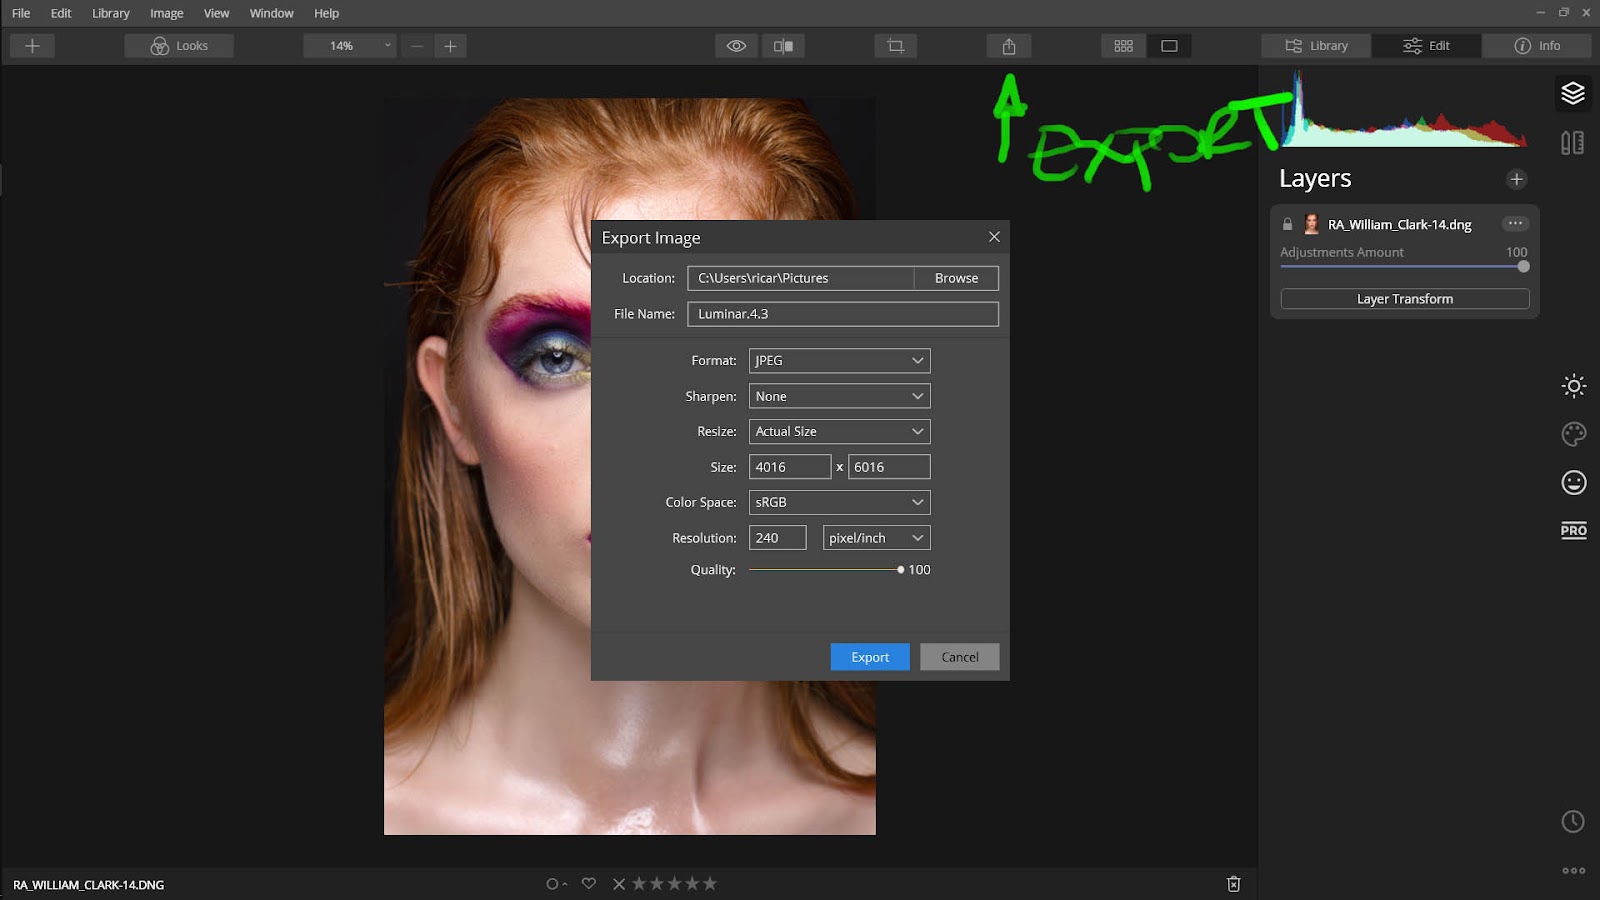
Once you image is done is time to export it and it can be really simple using Luminar, just click on the Export button on the top bar, and chose your file name, location, sizing and you are done. You can also use the integration with third party services like SmugMug or 500px and export the images directly to those services.
Or you can take the normal path and export your image to your hard drive. I just miss the option to export the files as DNG, but I think given how Luminar process the images this is a feature that I will not see soon, but I’ll take the TIF or PSD export, no problem.
Using Luminar with Lightroom.
Even though you can rely just on Luminar to edit your photos is good to know that we have a great integration between Lightroom / Photoshop and Luminar.
If you are locked for some reason in your Lightroom workflow you can still take full advantage of all the oceans inside Luminar. When installing Luminar on your machine check the boxes to install Luminar as a Plugins for Adobe product, and you are good to go.
We can access Luminar via Lightroom the same way we call Photoshop to work work in parallel with Lightroom.

Just right click your on the image inside the Develop module in lIghtroom and chose Edit in and after that Luminar 4. Done.
Luminar is gonna open a copy (.TIF) of you image with all your edits done so far, this file is gonna sit on the same directory where the original file is.
Once inside Luminar the sky’s the limit. You can take full advantage and do all you edit inside Luminar or you can do some back and forward between Lightroom and Luminar to edit the image as you intended to be.
Let’s a take as an example her ehow easy is to replace the sky of your photos using the AI Sky Replacement on Luminar. With just a fell clicks you can transform the a photo with a boring sky to a photo with gorgeous clouds or sunsets.

Basically only you have to do is to choose which sky you and to put in you image, this can be done using the menu Sky selection, and choose from one of the options that comes with Luminar or you can choose your own. You can even buy some skies on Skylum market place.
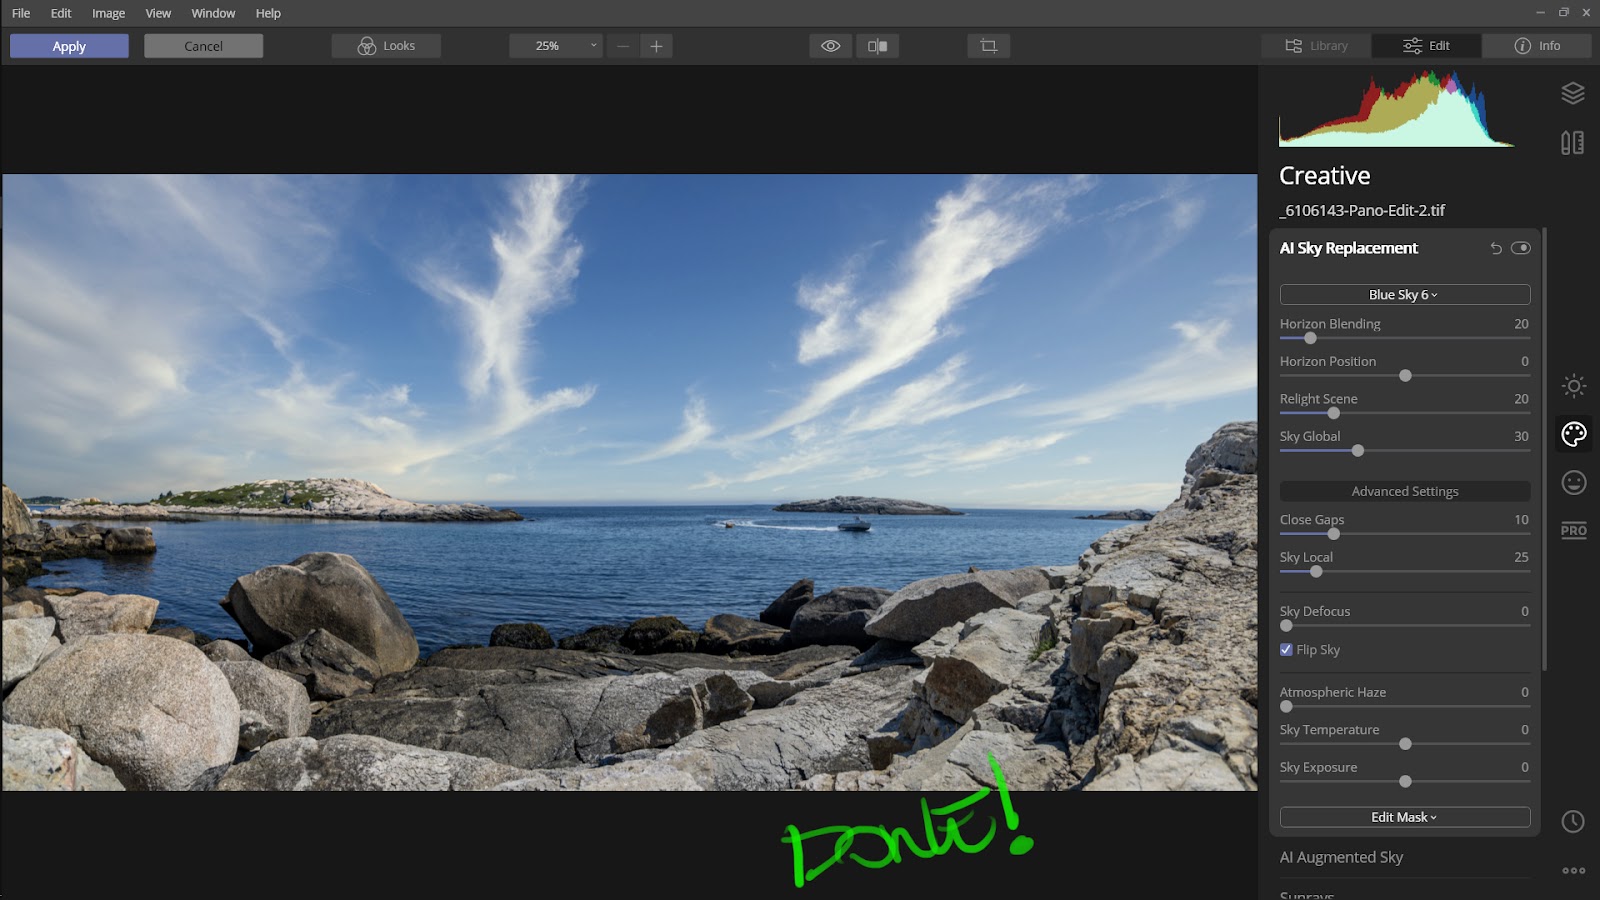
The best part here is the AI does almost everything for you and if you need to make fine adjust it is totally possible using the sliders.
The AI even adjust the lighting on the scene to blend the new sky with your scene more realistic, GOLDEN!!!!
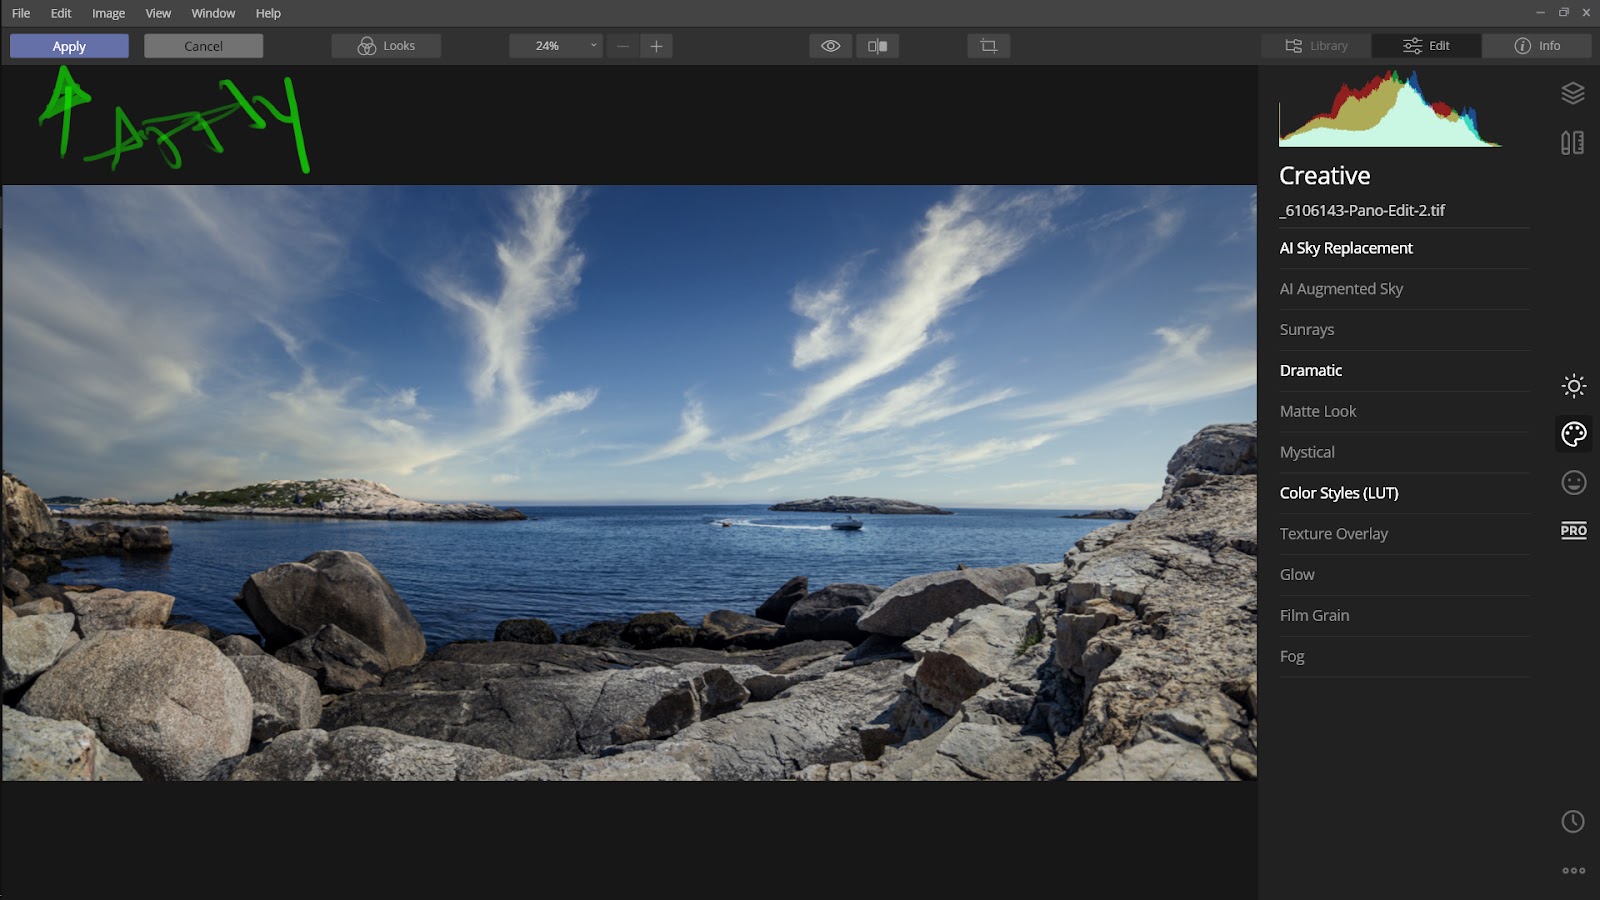
After you finished all your edits inside Luminar just click apply in the top left corner and the image will return to Lightroom with all the edits done, simple like that.
And if you wish, you can continue to edit it inside Lightroom with your normal workflow.
What now?
I have to say, I have just touched the tip of the iceberg here, because we have much more packed inside Skylum Luminar 4.3.
The best part for in all this history Luminar vs Lightroom is that you can buy Luminar and not just “rent it” which is the case with all Adobe products.
In the version 4.3 I can see a lot of improvements inside Skylum Luminar 4.3 and the future of AI image edit is being written by these guys probably in the future will become an invaluable tool for those who have to edit tons of images each day and don’t have the time to rely just on Lightroom presets.
If you are curious about Skylum Luminar go grab your copy here and start this revolution on your photos, because the future is here. If you use the coupon code RIXMASCA you will have USD 10,00 off of you purchase.
And that it for now, if you want more articles about what Skylum Luminar 4.3 can do, leave here in the comments and I will gladly write about it!