Well today’s subject is easy, fast and practical and will still help you save a lot of money, today I will teach you how to make hitters for photography.
The use of reflectors or hitters in photography is just one way to harness existing light, and jump to the eye specific places of the image, so today the theme is DIY hitters, an easy way to make yourself your own hitters.
Make your photography reflectors
This can be done virtually with any surface that reflects light, such as a wall, mirror, cardboard, expanded polystyrene, an aluminum foil, etc.
Dedicated photography reflectors come in many different colors, shapes and sizes. Silver, gold, white, and sometimes blends of these three colors commonly known as zebra reflectors are the most common colors.
There are also 5-in-1 hitters that include a black surface to absorb light, and a translucent surface to soften light.
Which format should be hitter for photography
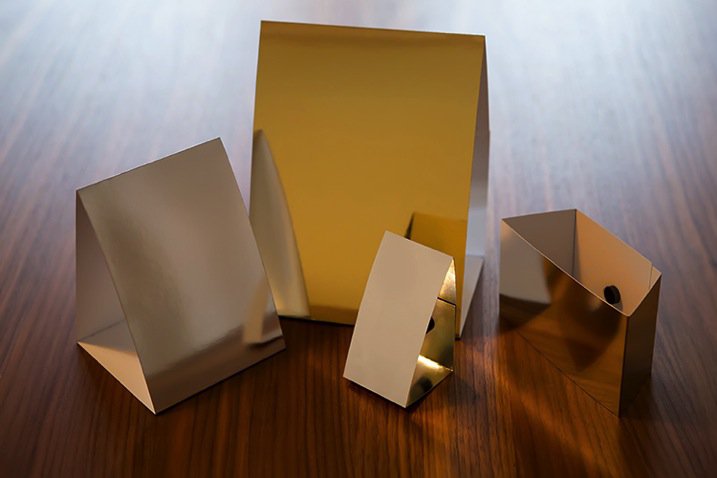
The shape of the hitter depends heavily on the subject you are photographing. Usually folding round reflectors are the most used because they are easier to handle, and also easier to fold, but triangular and rectangular hitters are very popular as well.
The size of the hitter also depends on what you’re trying to illuminate, and when it comes to small objects, which will be photographed on a table, things get complicated because ordinary hitters can be big and clumsy.
So let’s create our own DIY hitter in the size of the need for each situation we’re going to shoot.
Materials to make your hitters for photography
Even though you can use simple sheets of paper with some kind of object as a prop to hold your DIY hitter, the simple folding technique is sure to give you more control over the way you place your hitters.
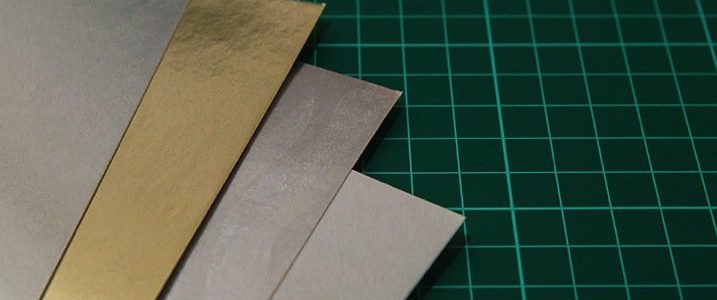
For starters, you will need some sheets of metallized paper. The ones I’m using here can be found in office supplies or craft shops, and exist in various sizes and colors.
I bought 50×70cm sheets, and that allowed me to make a good set of hitters of different sizes and shapes.
A cool thing about this type of paper is that the back it is white, so you can use the metallized side or just turn to the white side of having different types of reflections.
On the metallized side you can also choose papers that have some kind of texture, to create different reflections effect, making your light a little more complex.
Hands down
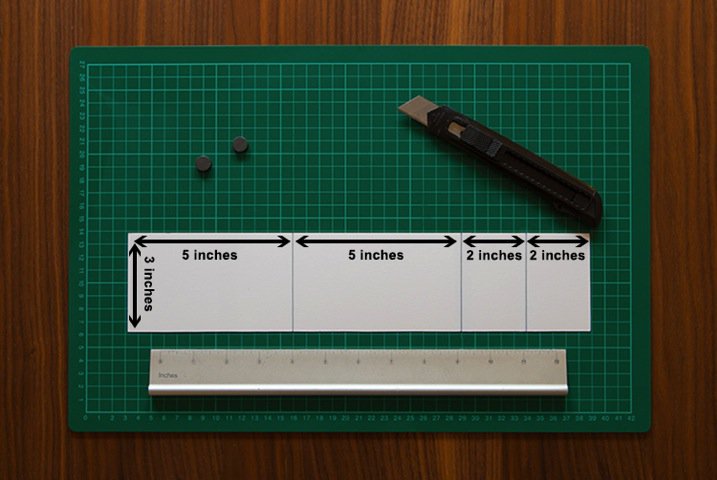
Now it’s time to cut the paper in size. That depends on the size hitter you want to create, in this case, I’m making an 8x13cm hitter.
Now mark the lines with a pen and fold the paper into those lines. You’re going to end up with something like this.
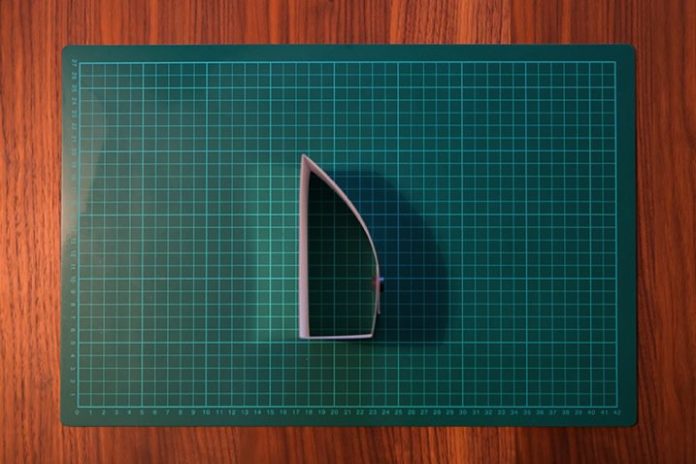
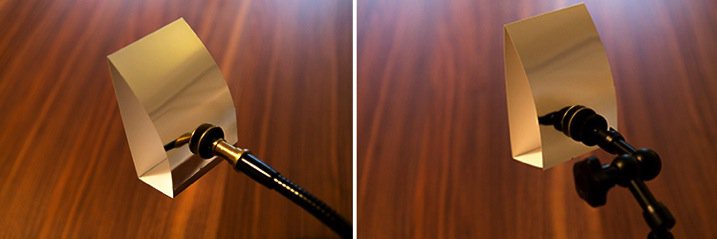
To keep the overlapping folds in place, I used small magnets.
You can use adhesive tape, velcro or even reusable adhesive, but using small magnets will give you more control when choosing the reflection angles of your DIY hitter.
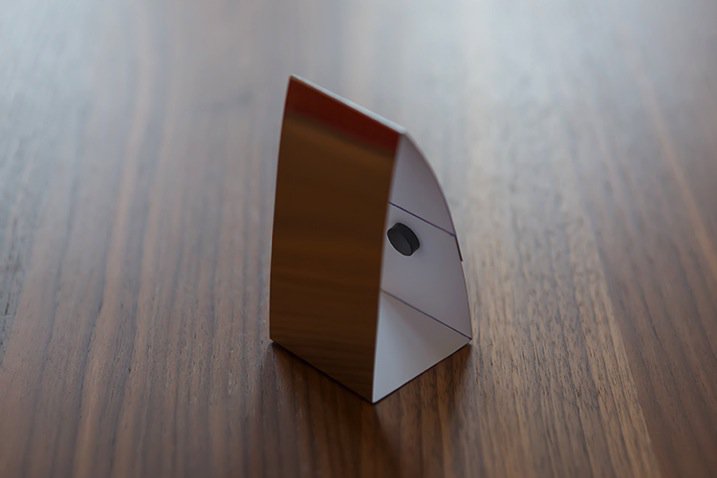
Magnets will also be useful if you are going to use your hitter on some stand, not on a table.
How to use your new hitter.
Now that we’ve built some nice hitters it’s time to test them.
Even if you don’t have a professional lighting system, you can use your new toys. Just have a window and use the light that comes through it.
You will be amazed at what can be done.
The following image is an example.
See how it was done
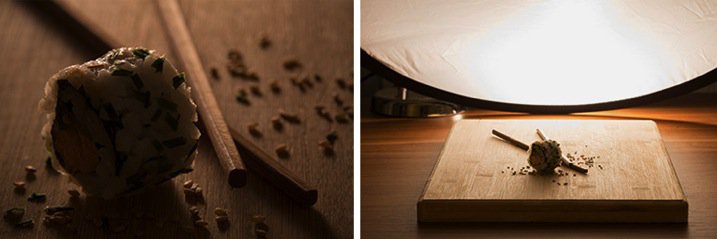
Left, photo without the hitters, just with the light in the background. Right, picture of the scenery montage.
Start with lamp or window holder in the background and a diffuser in front throwing light behind the object.
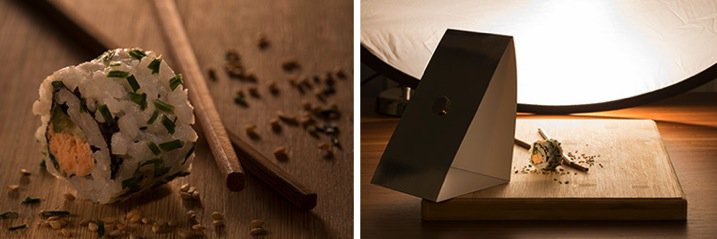
Left, shots with a big hitter. Right, shot of the batter’s positioning. Now, the same system only with the inclusion of a big hitter on the sideline.
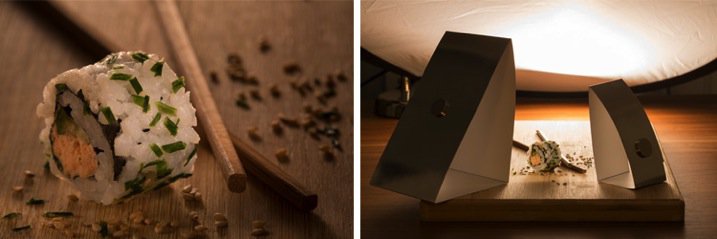
Left, final result with two golden hitters. Right, photo of the batting positions of the hitters.
And you can go on adding reflexes with your new DIY hitters. As it was done here where on the other side was placed a small hitter.
Well that’s it, don’t forget that you can change the color of your hitter to create different climates in the photo.
And then you’re going to do your DIY hitters? Leave a comments with the links to the results photos!

